Showing posts with label Share the Love. Show all posts

Saturday, January 28, 2012

Share the Love 2012 ~ North Chicago Children's Photography

It's that time of year again! Time for me to give back a little of the awesome love I get from my clients throughout the year. Time for me SHARE THE LOVE!!!! Who's ready for some lovin'?!?!?
(Me! Me! Me!)

Wait before we get all lovey dovey, go check out the precious little ones with whom I SHARED THE LOVE last year. So cute, right? Okay, back to the contest....

Back for its second year, it's the
SHARE THE LOVE CONTEST
2012

chicago family photographer lake county illinois baby north shore
This is your chance to win

- A FREE (uh yeah, FREE) custom portrait session
- One 16x20 wall print
- Two 8x10 desk prints
- A custom photo book using the photos from your session
- AND 10% off all additional prints from your session


grayslake libertyville highland park lake forest winnetka deerfield photographer photography

That is a seriously sweet (or shall we say LOVELY) deal! So here's what you need to know:

HOW TO ENTER:
~Between now and February 5, 2012, e-mail a picture of a little (or big) one you love to kspShareTheLove@yahoo.com.
~ In your email, in two sentences or less, tell me how you’re going to “share the love” this Valentine’s Day.

HOW TO WIN:
~ Starting February 6, come back to the KSP blog to vote for your favorite entry (and of course, send all your family, friends, neighbors, co-workers, etc to vote, too!). Come back every day to vote again!
~ Voting will continue through February 13.
~ The winner will be announced February 14 (you know...on Valentine's Day)

Got it? Remember: send a picture and tell me how you're going to share the love. In return, you just might get a little KSP love shared right back!

Official Rules:
1. Entries will be accepted starting January 28 and through February 5th. Siblings may be entered in a single photo. Only one entry per person.
2. The person submitting an entry must be the parent or guardian of the child in the submitted photo.
3. Please do not enter photos taken by other professional photographers. KSP photos are okay, though.
4. Anyone may enter, but the session must take place in the Chicagoland area before June 1st, 2012 OR (new this year!!!) in Pinellas County, Florida the week of July 29, 2012.
5. Voting will take place February 6th through February 13th.
6. You may vote ONCE PER DAY. Multiple votes on the same day will disqualify the contestant (so no cheating!)
7. Winner will be announced here on the blog on February 14th, 2012.
9. The winner is the photo with the most votes.
10. Does not apply to sessions already booked. Must receive at least 5 entries for the contest to run.
11. Prize value: $300.

For questions or to enter, e-mail kspShareTheLove@yahoo.com


I cannot wait to see all those LOVELY faces so get your entry in today!

Sunday, October 16, 2011

Project Nursery: Step 6

Step 6: ART!!!

As promised, I am back to share the art we used to polish off the nursery walls. This is where I really planned to bring the vintage book theme into play, so a while back I started trolling etsy and some local stores and markets for vintage books that I thought might fit the bill.

Originally, I had planned to gather some inexpensive old books and cut them up to create a large gallery, but in the end, I just couldn't bring myself to do it. A couple of the books, in particular, I really fell in love with, and I just could not take scissors to them. Instead, I sweet-talked the hubster into taking them into work and surreptitiously using the color copier to copy out the pages I wanted (Shhhhh! No telling on him!). I'm so glad I did it that way because Max and I have already enjoyed a few hours reading several of the books I purchased, and now they are on display in the nursery to see and be read.

Here is the final illustration gallery over the crib. Don't mind the blurred out frame. We recently settled on a name for this babe but have decided not to share it until he arrives, and that frame includes the baby's first initial, so it will have to remain blurred until further notice.


Clockwise from top left, the illustrations came from Peter Pan, Dick and Jane, Raggedy Ann, The Tale of Peter Rabbit, Alice's Adventures in Wonderland, Where the Wild Things Are, and The Travels of Babar.


A vintage book nursery, clearly, must include lots and lots of books, but traditional book shelves, while practical, don't show off the part of a book that most appeals to a child: the cover. The solution is to turn the books around, of course! Although these ledge-style shelves can be found at any number of children's retailers these days, my father-in-law graciously agreed to make them for me, thus saving me some money and allowing me to customize the size and color for the nursery. He even called Land of Nod to get the exact specifications for their shelves! Thank you, Al, for the awesome shelves!


Lastly, I wanted a piece of art in the nursery that incorporates our faith, since it is an important part of our family and I want to pass it on to our boys. I settled on this passage which is found, in various forms, throughout the Bible. The final product, itself, was a DIY effort. I covered a blank canvas purchased from Hobby Lobby with some scrap fabric and stapled it to the back. I arranged the text as a photo in photoshop and had it printed on regular photo paper. Then I used modge podge to attach the photo to the fabric and modge podged over the top of the photo only. Here's the final result:


Only a few more things remain to finish up the room. I'll probably wait to do a final reveal of everything until after baby arrives because I am planning to use some photos of the little man himself to complete the walls. But it looks like the little guy could be arriving any day now, so you might not have long to wait!

Wednesday, October 5, 2011

Project Nursery: Step 5

Who's ready for some TEXTILES?!?!?!?

Oh yeah. You know you've been waiting and waiting for this! Right? (Just go with it.)

To start with, let's reminisce about the DIY no-sew crib skirt from this post. Once my additional fabric arrived, I finished that puppy up and got it in place. Next I had to wait for the bumper to arrive. I ordered a custom-made bumper from this Etsy vendor. The way it worked was I selected and purchased the fabric, then sent it to her and she whipped it up into this lovely six-panel bumper. (I'm guessing her sewing machine skills are bit up on mine). The bumper arrived today and it is so pretty! Rather than being one long piece, it is six separate panels that tie together onto the crib.


As far as I can tell so far there are pros and cons to this approach. Pro: since our crib does not have any slats in the back, we can always remove the back two panels since they are unnecessary and don't have anything to tie on to. Con: if we want to use the back two panels, they droop forward a little bit, so I'll have to throw some velcro or something onto them to hold them up. In reality, I'll probably just ditch the back two panels once the baby is sleeping in the crib full time, but for now the whole thing looks pretty nice.


I also finally got around to whipping up some happy yellow curtains for the room. I gave the sewing machine one more shot. It didn't go well (so the Mighty Mender now resides at the Goodwill). But not to worry. Remember, I have a long and successful history with iron-on hem. Curtains? Piece of cake! Yes, you too can DIY some basic panel curtains in no time. All you have to know how to do is a) cut straight, b) fold and pin, c) iron in creases, and d) iron on the iron-on hem. Voila!


I chose to hang mine using curtain clips, but if you make your top seam wide enough, you can run a curtain rod through them, too. Here's a close up of my handi-work and the curtain clips.


And for my last (for now) textile project, I used some fabric remnants to make a book-themed bunting for over the closet. (Because it's practically illegal to design a baby nursery without bunting these days.) My plan for the bunting was to not only pull in the book theme, but also bring some aqua touches into the room. I LOVE the result. (FYI this is also a no-sew project. I assembled everything with hot glue). Aren't you totally digging that aqua chevron fabric? I know, me too.


By the way, you should pretend that fabric hanging out on the rocking chair is a quilt. It will be. One day. And in case you're wondering, the book pages in the bunting are from Alice's Adventures in Wonderland and were purchased from this Etsy vendor (she tore up the book, not me. I still can't bring myself to deconstruct a book for this room. Yet). Oh and all the fabric came from the designer Premier Prints, but I purchased a lot of it from Fabric.com and also from BuyFabrics.com.

So, you likey? Me likey. No rest for the weary, however. Only five more weeks to go and there's still much to be done. Stay tuned for my next trick....ART!!!

Tuesday, September 6, 2011

Project Nursery: Step 4

Step 4: Fail

Or, at least, semi-fail. Every big project needs to have some failures along the way, right? Where's the fun in having a totally awesome, failure-free, straight-and-narrow, gorgeous, pin-worthy home improvement project? No where, that's where. That's what I'm going with, anyway.

This weekend I decided to tackle two projects. One: Line the drawers of the changing table/dresser with pretty paper. Two: Get started on the DIY crib skirt. Unfortunately, to varying degrees, both of these little projects had a bit of "fail" involved.

So lining the drawers of the dresser. Sounds so easy right? Especially when you're working off of the very clear instructions written by John and Sherry at Young House Love, which even includes pictures to show how easy it is. Then there's me.

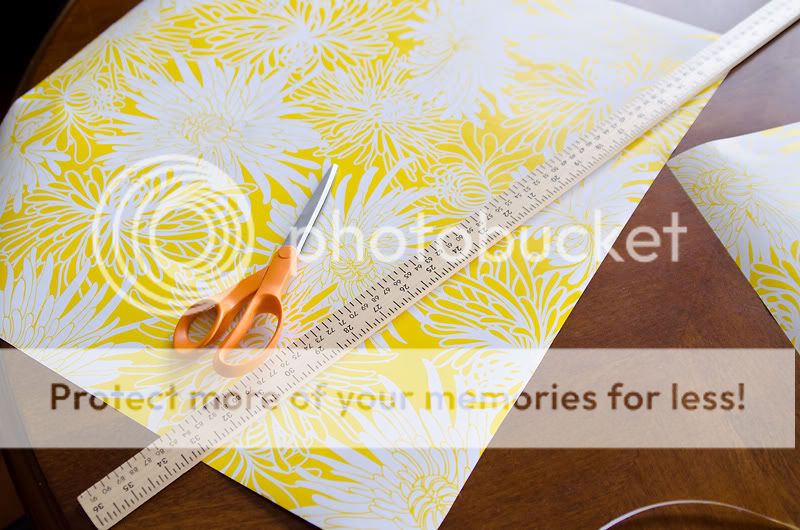
I loved the idea of lining the drawers just to add that extra bit of "pull it all togetherness" and (maybe) give me a bit of cheer every time I open up the top drawer to grab a wipe while on poopy patrol. To start with, I picked up this wrapping paper at Blick Art Supplies.


Although perhaps a little girl-ish, the yellow shade is exactly perfect for the stripes on the walls, so I had to go with it. After cutting it down to size, I pulled out what I've recently learned is the work horse of the craft world, Modge Podge. Spread myself a thin layer on the inside of the drawer and ever so carefully lay the first piece of paper into the drawer. Smooth it out, make sure it's lined up straight and wrinkle free. Voila!

But wait. No voila. Because after it dried for 30 seconds or so, the paper started bubbling up and wrinkling. Ack! Unfortunately, though, at this point it was too stuck to try and smooth it out. The result was something like this:


Major bummer and not so pretty. I called Adam in to ask his OCD-influenced opinion on what I should do, but being luke warm about the project to begin with, he only said "well, if you pull it up, you might mess up the drawer so it will have to stay that way." Gee, thanks.

So on it stayed and despite my best efforts to fix the issue, all three drawers ended up as wrinkly as a raisin. Oh well. The colors are still bright and cheery, and they're going to have clothes on top of them anyway, right? Here's the end result. What do you think?


But no matter. Putting aside my feelings of crafting inadequacy, it was time to start project number two, the crib skirt. Let me preface this with telling you something important: I don't sew. Okay, I can sew a button and I can sew a little dinky pillow, but beyond that it's a no go. Despite my fairly extensive education, somewhere along the way I missed How to Use a Sewing Machine 101. Until now, though, it hasn't mattered, due to a little miracle called iron-on hem. Oh iron-on hem, how I love thee. I love thee so much I made 20+ table runners for my wedding reception using you. I love thee so much I made Max's curtains for his bedroom using you. But this weekend I decided to stray. Forgive me.

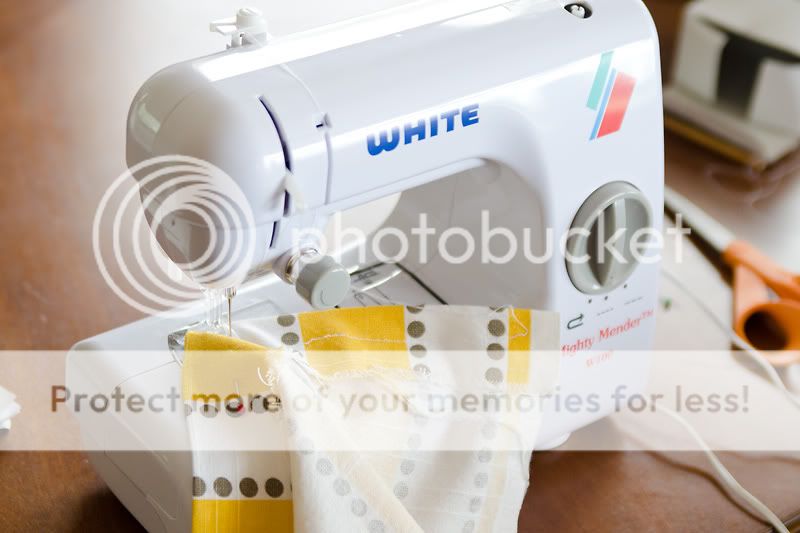
All along I've been hoping that I could not only make a crib skirt for the nursery, but also the curtains and a quilt. After some thought I passed on the task of making the crib bumper to an Etsy vendor (more to come on that when it arrives), but I felt fairly confident that if I could just get my hands on and learn to use a sewing machine, the rest I could handle. So I had my mom send me her mini-sewing machine, the White Mighty-Mender 100 and off I went.

Things were going well. I had my fabric measured and pinned up. I carefully followed the instruction manual to get the machine threaded up. I was feeling good. So I sew:


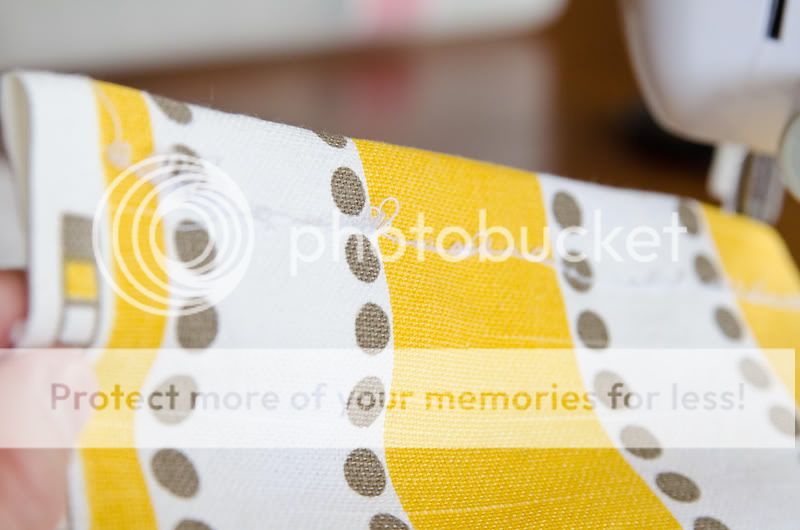
Sure my lines could be a little straighter, but I'm feeling okay about this project. That is, until I turn the fabric over and see this:


Holy Hot Mess, Batman! What on earth did I do? Obviously, there must have been an issue with how I threaded the bobbin thread (is that even the right term?), so I take all the stitches out, unthread the machine and start over. Only this time I can't get the bobbin thread to thread at all. The instruction manual (and extensive google searching) keeps telling me I just turn this little knob and the needle will pick up the bobbin thread and off I go. But no. No matter what I try or how many times I turn the darn knob, the bobbin thread will not be picked up. After an hour of trying (and some less than desirable language), I end up with this:


Now, this should be the place in the blog post where I tell you that I had a sudden epiphany or I spoke with a friend who quickly set me on the right path or the sewing fairy visited my house and made everything for me. But it's not. Because you know what I did? I put the blasted machine away and I pulled out the ironing board and my good ol' friend iron-on hem. And in no time, I had a crib skirt. I had no idea how to use the sewing machine, but gosh darn it, I had a crib skirt. Seriously, what was I thinking with that sewing machine business? Okay, so if I really want to do the quilt, I'm going to have to figure out where I went wrong, but for the crib skirt, iron-on hem makes me happy.

Here's the final result (ignore that one side is missing, I ran out of fabric and had to order more):


Oh and by the way, I used this idea from Honey & Fitz to make the crib skirt adjustable to that when we lower the mattress as baby grows the skirt won't drag the ground, a problem we ran into with Max's crib skirt. Great idea, right?


So, for those of you in the know, where did I go wrong with the mighty mender? Anyone? Please help (or offer to make me a quilt and some curtains. I'll take either one!)

And so ends the semi-fail portion of our Project Nursery program. Next time, on to bigger and better things!

Monday, August 29, 2011

Project Nursery: Step 3

Step 3: Paint (a.k.a. Yikes! Stripes!)

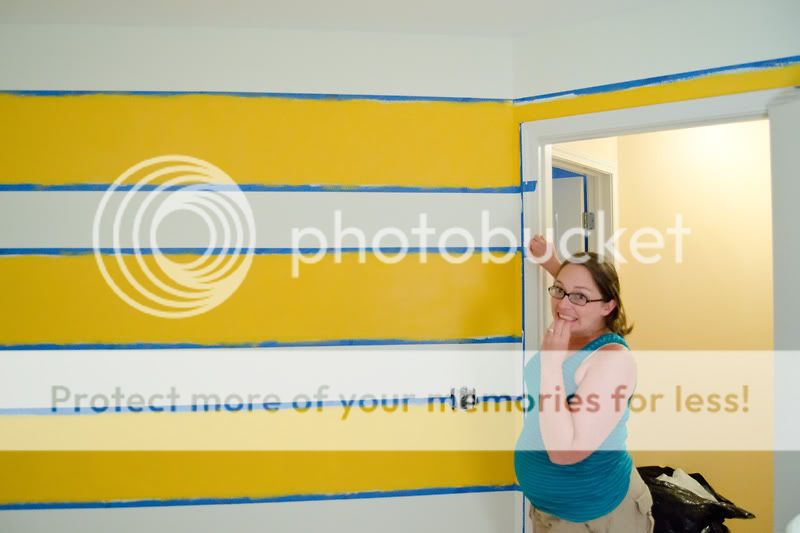
Aside from the vintage book theme, the one thing I have been set on since beginning designs for this nursery is to have some sort of striped accent wall. At first the plan was to paint the entire room yellow and have one wall with white stripes. I soon came to my senses, though, and decided that a completely yellow room, especially one as small as BSv2.0's nursery, would probably subject my newborn baby (and all of his visitors) to a lifetime of headaches. All in all, probably something to be avoided. So. New plan. Creamy white walls and one wall with yellow stripes. Sounds great, right? Right.

Next step. Paint the stripes. Ack! The hubster was all "Are you kidding me? Do you know how hard that is going to be?" And I was all "Yes. But we're doing it anyway. You don't like it? I'll do them myself." To which he was all "No, no. I'll do them, because you won't do them right." Me: "Whatever."

(By the way, conversations like this are why we bought a move-in-ready house and not a fixer-upper.)

So it was after weeks agonizing over the painting of the dreaded much-anticipated stripes that we set off on a little adventure in painting. Come with me, will you? (But be prepared for some pretty gnarly, noisy, and not KSP-worthy images. Just warning you.)

Here's what we started with. My beloved Parisian-themed guest room. Bye-bye Paris Room. You will be missed:


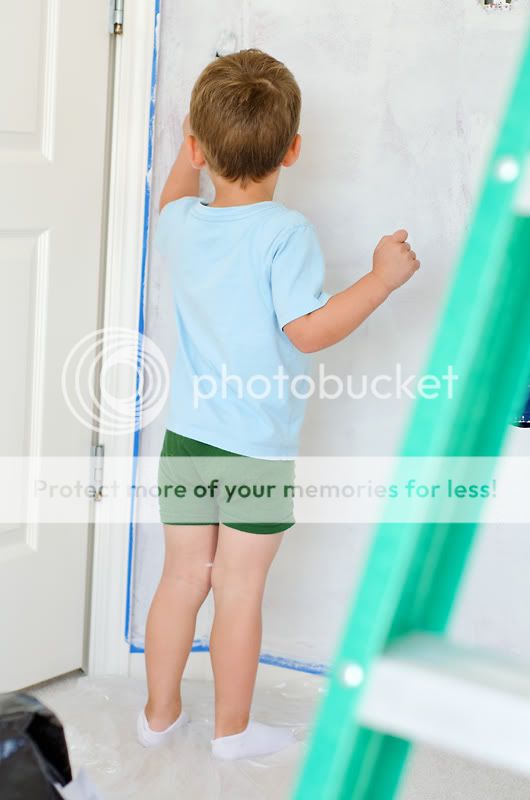
Oh and did you catch that the walls were RED? RED!!! Two coats of high-coverage primer is what it took to cover that stuff. But eventually, the red was no longer. In the process we pondered name choices (but didn't get very far):


And let Max get in on the action. (Btw, I'm obsessed with his cute little butt in these boxer briefs):


After applying the base coat in a creamy white (a rather boring step, therefore no pictures), it was time to get striping.

A lot of the work was done late at night and we lacked furniture in the room. Who thinks this little bit of balancing trickery was a good idea? Yeah probably not so much:


Anyhow, finally we (and by "we," I mean "Adam") started the laborious task of measuring and taping all the stripes:


Why is he doing that on a two-step-high monkey stool? Yeah, we asked the same thing about two minutes later. While he did that I performed a little piece of geniusness of my own (thank you, Google). I painted a thin layer of the base coat over the tape edges to seal off the tape and (hopefully) keep the yellow from bleeding through:


Did it work? We'll find out. Finally, we were all taped off, and Adam looked like this:


Sad Adam.

No time to be sad! The next day it was time to paint! Squeeeee!


Officially, the color is Golden Moon, but I like to refer to it as Velveeta Shells and Cheese. Yum!

Two coats of yellow later, it was tape peeling time. We were so skeeeeered! (Get it? That's my skeeeeered face):


And how did the stripes turn out? Wouldn't you like to know.

Drum roll.................
.
.
.
.
.
.
.
.
.
.
.
Are you ready for it?
.
.
.
.
.
.
.
.
.
Wait for it.
.
.
.
.
Wait for it.
.
.
.
.
.
.
.
TAH DAH!!!!!!!!!


Do you LOVE them? Well, even if you don't, I DO LOVE THEM!!!!! They are so exactly my vision. I just love the brightness of the yellow and I'm super pleased that I picked this wall so that the stripes extend around the little angle in the doorway. I can't wait to get the furniture in the room and start getting the wall decor organized and ready to go up. But first, it's on to the next step: textiles. Oo la la, right? I know. So exciting!

Wednesday, August 10, 2011

Project Nursery: Step 2

Next weekend will mark the official deconstruction of our guest room in preparation for BSv2.0's nursery. Gasp! I'm so excited to get started! In preparation, I thought I'd try my hand at a design board to get some of the more important details in one place. Probably not the best design board you've ever seen, but it does the job.


The nursery will be a vintage book theme. I'm hoping to use book illustrations and pages throughout the room, with the focus being a big frame collage above the crib, as well as a kid-friendly book shelf on another wall. As you can see, my recent obsession with yellow will dominate the color scheme, but I'm also bringing in some brown and turquoise accents. On the opposite wall from the crib will be (if the hubs and I don't kill each other doing it) a yellow and white striped accent wall. (Squeeeee! I'm so excited about the accent wall!) This will be where the changing table is and I want to leave part of that space blank to add a canvas wrap of le bebe after he arrives.

You can see vendors for most of these items HERE on my pinterest board. I'll keep you updated on the progress (and whether we survive painting the wall)!

Monday, May 23, 2011

Sharin' the Love with Lexi and Andrew ~ Chicago Children's Photographer

Remember the Share the Love contest from February? I finally got to meet up with the adorable winners, Lexi and Andrew, this weekend. We thought the rain was going to get in our way, but the day turned out to be sunny and beautiful.

Lexi and Andrew were two super fast little kids. They were too busy checking out the all the cool stuff at the Chicago Botanic Gardens to care much for me and my camera. Can you really blame them? But the good news is my camera is faster than a speeding toddler so I was still able to capture them in all their kiddie glory!

Thanks for coming out to see me and giving me my workout for the day, Lexi and Andrew!